Feeds:
Posts
Comments

Autoethnography vs. Life

Sometimes it seems like documenting ones life publicly has become the cultural norm. With blogging, Facebook, Instagram, Twitter, Tumblr and more, it seems as if everyone is there, putting their lives out for the world to see.

At uni I did a unit on autoethnography, which I really enjoyed. I feel like blogging is the autoethnographic form for the 21st Century, and something I’d quite like to do. Except for the minor technical hitch that life tends to get in the way. It’s not surprising that Facebook, Instagram, Twitter and Tumblr all tend towards short text or image based content. Long form, thoughtful writing – which, I think, autoethnography ought to be – takes time and concentration, both of which are scarce in the chaos of daily life.

Which is how, despite my initial grand plans for documenting and reflective writing and so on, I find myself 36 weeks pregnant, with not one word written about the experience. Even though writing about it was something I wanted to do all along, even though I thought of things to write about, even though I haven’t been working for three weeks now. When I stopped work unexpectedly early, thanks to a rather unexpected redundancy, I had grand plans for what I would do with all that “extra time”, but alas, writing was just one of a host of things that moved from the “I wish” list onto the already crowded “to do” list. The complex logistical project that is preparing for a baby is just one of those things I wanted to write about, but I also have to implement that project – researching, shopping, getting educated, making decisions, clearing out and reorganising the house, jumping through bureaucratic hoops (lookin’ at you, myGov), jumping through medical hoops (yay, gestational diabetes), etc, etc.

So, yeah.. I think the hardest part is getting started, which I’ve kinda now done. Will that do the trick and get things rolling? Or will the looming (but uncertain) deadline push all but the essentials off the list? Hopefully I can manage a bit of both.

So I’m making a Minecraft adventure map to inflict on my friends, and I’m finding it quite a frustrating experience. I spend quite a bit of my time futilely searching the Internet for resources and tips.

My searches range from the practical:

  • How do I use a command block?
  • How do I build a redstone powered piston door?
  • How do I spawn mobs in specific places?
  • How  to I make a hollow glass sphere in MCEdit?

To the more philosophical:

  • How on earth do I get started?
  • How do you know if it’s too easy or too hard?
  • How can I gently encourage players to stay on track and not just bust their way through my carefully built dungeons?
  • Why has no-one ever written a good text-based resource for anything, especially not the thing I was desperately trying to figure out when my Internet was shaped for 2 weeks?

Despite these difficulties, I think I’m doing pretty well so far. I’ve decided on a Zelda-inspired structure of 1) Travel through the world 2) Themed dungeon 3) Repeat. I’ve made a rather nice “Forest Temple”, moved on in frustration from an underwater city (hollow spheres? anyone?), and am now playing with redstone in my mildy-Egyptian themed “Sand Temple”. I’m thinking of documenting some of my progress – although not too much, because I do want to inflict the finished product on my friends and I don’t want to spoil the sense of adventure. But here’s a little sneak peek:

Egyptian-ish Sand Temple

Friday night was the first time I drove at night since getting back from Burning Man. As I was driving along, I saw a couple of people crossing the road up ahead. They were wearing fairly dark clothes, and the road wasn’t very well lit. My first thought was a somewhat indignant “Why aren’t those people wearing lights?”, and my second thought was “Wait, what? Hehehe.” And then it happened again with the next set of people, walking along the footpath, and the next. I imagine the effect will wear off, as I get used to people walking in the dark without EL wire or glowsticks or Christmas-tree lights. But right now my brain still classifies it as a bit reckless, a bit silly, and a bit inconsiderate to walk around at night without personal lighting.

Bags Packed

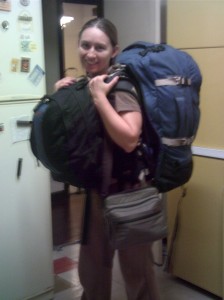
All packed. Just one (checked) bag, but it's absolutely chockers.

I’m packed and ready to go. My back hurts and I’m exhausted – the last few days have been busy and stressful, trying to get everything done.

I’ve got a bit of sewing still to do en route from Texas to Nevada, but my bags are packed, my boarding passes are printed, and my sewing machines will both be glad to see the back of me (I’m taking them both for a service when I get back, poor things).

Now I’m going to get a few hours sleep before I have to get up at 3:30ish to head to the airport (blergh).

There might be an update or two in the next week, but I’ll be writing lots of notes, like a good ethnographer, so I’ll at least have lots to say when I get back.

Been Too Busy To Blog

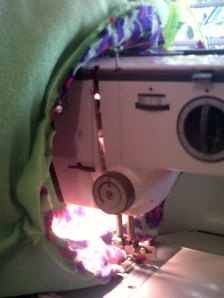
Sewing with EL wire & faux fur

Sewing with EL wire & faux fur

Starting a pile of stuff to pack

Starting a pile of stuff to pack

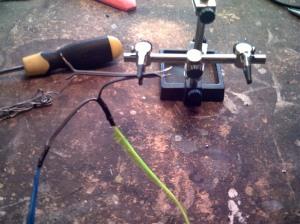
Learning to solder EL wire

Learning to solder EL wire

Three strands of EL wire done, 12 to go

Three strands of EL wire done, 12 to go

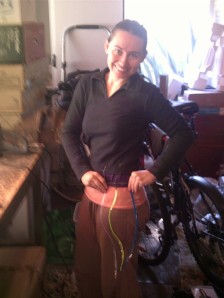
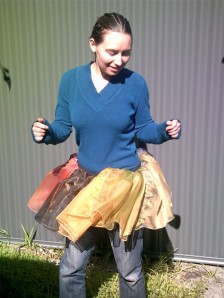
Doing the I-made-a-tutu dance

Doing the I-made-a-tutu dance

Sheep hat!

Sheep hat! (with sheepskin from my old car seat covers)

Shibori Experiments

I’ve had an interest in shibori – traditional Japanese fabric dying – for a while, since I did a workshop at a textile art exhibition a couple of years ago. One of my plans for Burning Man costumes was to dye some voile and make a bunch of light tops for daytime wear.

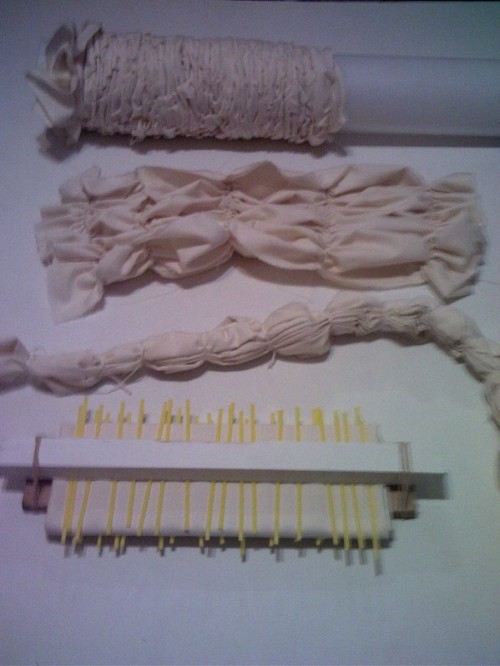
Yesterday I prepared my pieces of fabric. I cut four pieces of voile in different sizes, and folded and scrunched them in various ways…

Four shibori experiments all ready for dying

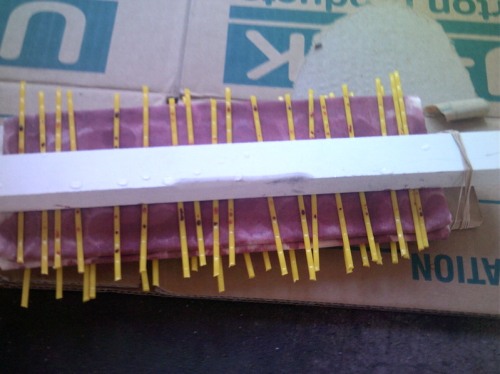
Top to bottom: 1. wrapped with string around a plastic tube and scrunched up tight; 2. stitched and gathered; 3. folded with a diagonal concertina fold and tied with string; and 4. folded in a pattern I made up (it might have a name but I don't know it) and then pressed between two bits of wood, with some chunky brush-bristles for texture

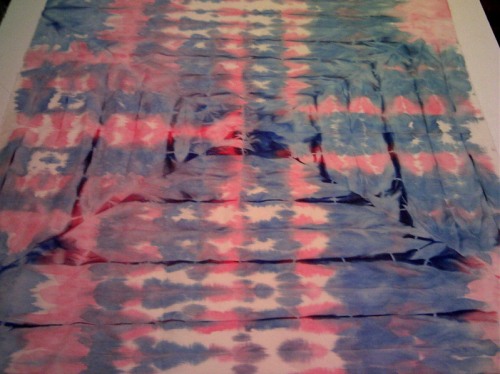
The dye I used is fancy stuff called Liquid Radiance – unlike most other dyes you can use it on any sort of fabric, and you can use it as paint too. In some ways it doesn’t work quite like other dyes, so I wasn’t sure how my experiments were going to come out. I was also trying not to use too much of it, so I used the dropper bottles instead of the usual method of dipping the fabric in a container of dye. That let me do some multiple-colour stuff that I couldn’t have done the other way. The voile resisted the dye a bit – I ended up dampening the fabric with a spray bottle to encourage the dye to spread.

Here’s what I got – first the ‘In Progress’ shots, and then the results:

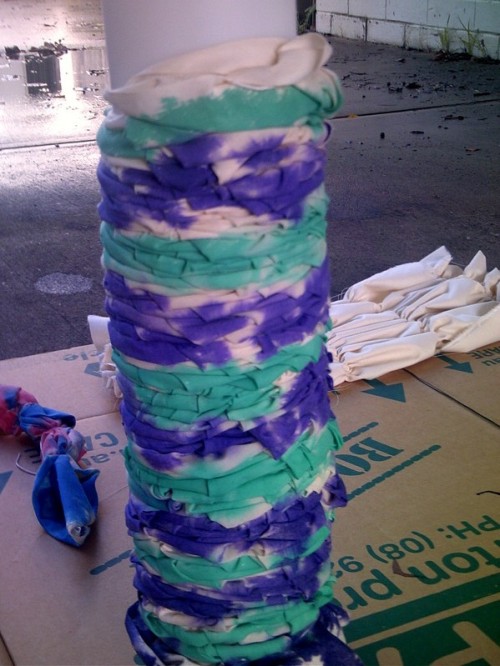
Scrunched around a tube - in progress

Scrunched around a tube - in progress

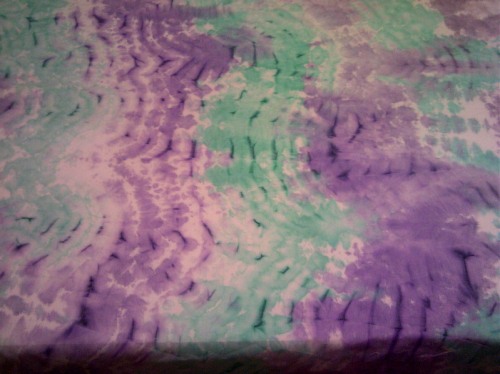
Scrunched around a tube - the result

Scrunched around a tube - the result. This technique is supposed to produce patterns that look like waves or ripples - I think you can see that effect here - hooray!

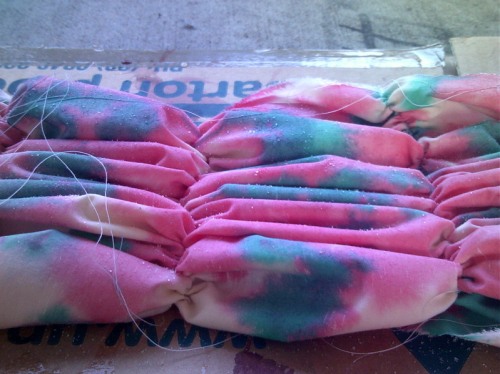
Gathered and salted - in progress

Gathered and salted - in progress. For this one I sprinkled some salt on the piece after applying the dye. The salt dries up the colour, making little spots. I hoped the salt effect would show in the loose parts and not penetrate so much in the tight gathers.

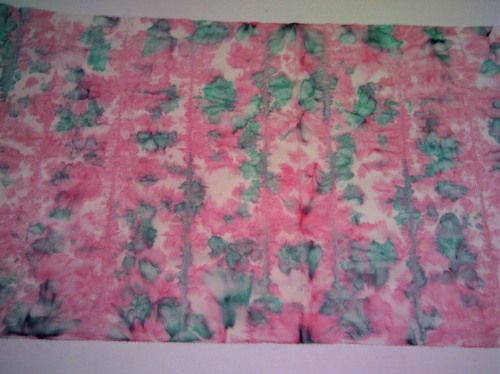
Gathered and salted - the result

Gathered and salted - the result. Here is the wide view of this one. The lines of gathering didn't have as much effect as I'd hoped. Maybe next time I'll try a shorter stitch or more than one line of stitching at each gathering position.

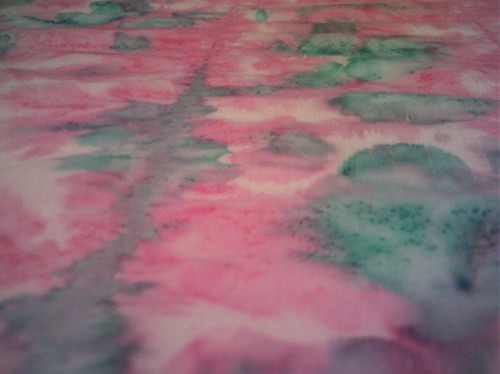
Gathered and salted - a close up

Gathered and salted - a close up. Here you can see the tiny spots. Next time I'll use the right sort of salts instead of table salt - and in chunkier pieces.

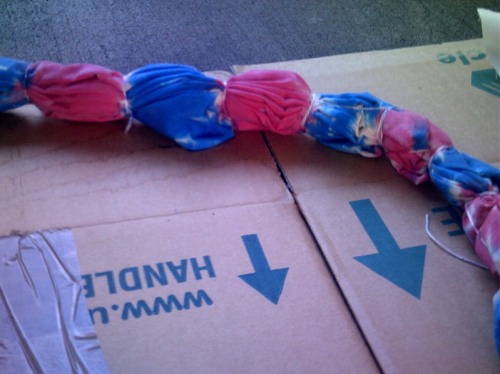
Concertina fold and tied - in progress

Concertina fold and tied - in progress.

Concertina fold and tied - the result

Concertina fold and tied - the result. The folding was actually a bit more complicated - folded in half, and then all the corners folded in like an envelope, and then concertina folded - the envelope bit gives that square effect. The blue ran a lot and ended up kinda overtaking the red.

Funny fold with brush bristles - in progress

Funny fold with brush bristles - in progress. I started with just brown, but at the end I decided it was a bit boring, so I added some splashes of the last of the purple.

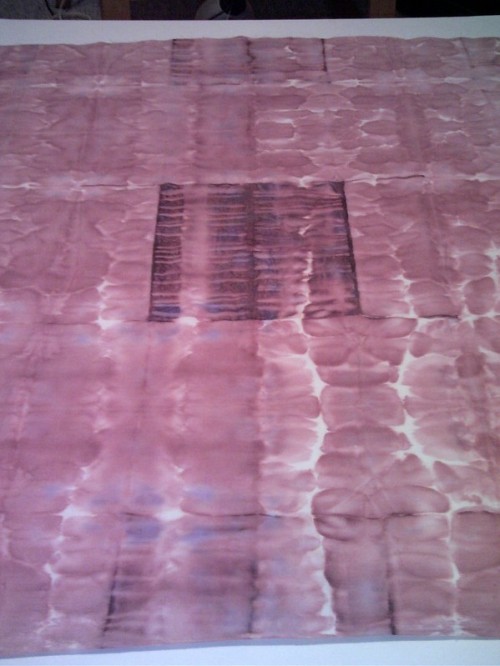
Funny fold with brush bristles - the result

Funny fold with brush bristles - the result. The bristles only really had an effect on the outermost layer, resulting in a cool centre panel thing. I'm going to have to rethink my plans for this piece of fabric - make that panel a feature. This dye seems to travel quite easily along the fabric, even into tight places you don't want it to go - a bit of a complication for mechanical resist techniques.

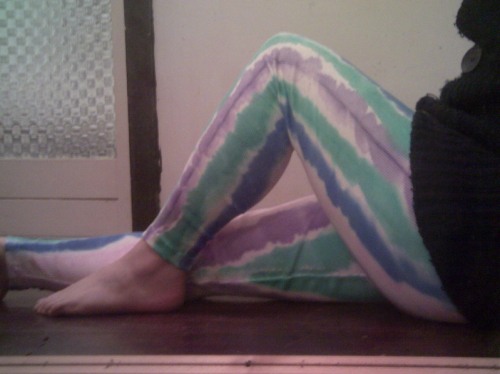
And now, the pièce de résistance… I acquired a pair of white thermal pants – free, but boring 😛 So I made them stripy:

Stripy thermals

Stripy thermals - not actually the pièce de résistance. But fun.

(Following on from Part 1 – making a pattern)

Step 3 – Starting the Mock-up

  • Firstly, the reason for making a mock-up instead of jumping straight to the Real Thing is to make sure it will fit properly – far better to be making adjustments to a practice version than to your (often fancy and expensive) final fabric.
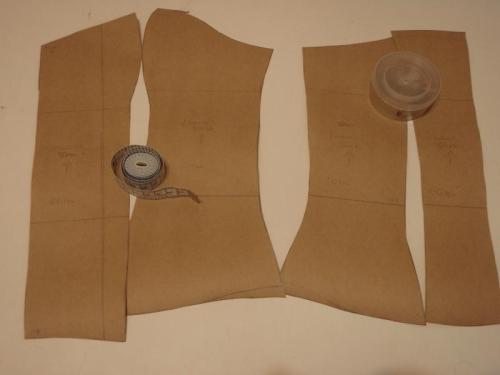
  • I made a photocopy before I cut out my paper pattern pieces, just in case something happened to them. Then I cut them out, and labelled them – which piece, which way up, and my name (because there are three of us making corsets at the moment)

    Paper pieces cut out. I had to weigh them down - they wanted to curl after their trip to the library in a roll.

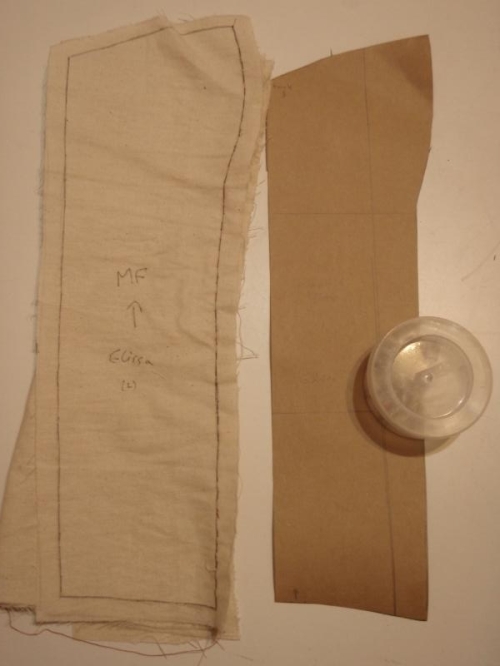
  • The next step, which I forgot to photograph, was to cut out two of each pattern piece from some cheap but relatively sturdy material. I used some plain cotton calico, but twill would have been a bit sturdier. Very important– don’t forget to add seam allowance! Mark the pieces so that you know which are for the right hand side and which are for the left hand side – or some other system to help you figure out which seams go with which other seams – there’re lots, and it’s confusing.

    Note the extra seam allowance around the edge of the fabric piece. I usually add seam allowance to my pattern pieces, but for this I wanted to be able to mark the exact seam lines to follow.

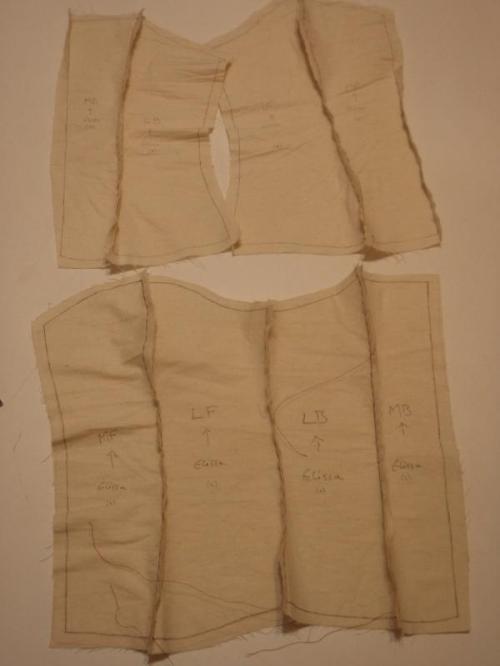
  • Once you have your pieces it’s time to sew them together – all the left hand pieces, and all the right hand pieces, so you end up with two half-corsets. I hand stitched mine, but the others machine-stitched theirs – whichever you prefer. I thought it would be easier to get the differently curved seams accurately matched by hand… Despite my careful measuring and careful sewing, none of the seams match exactly, but they’re pretty close.

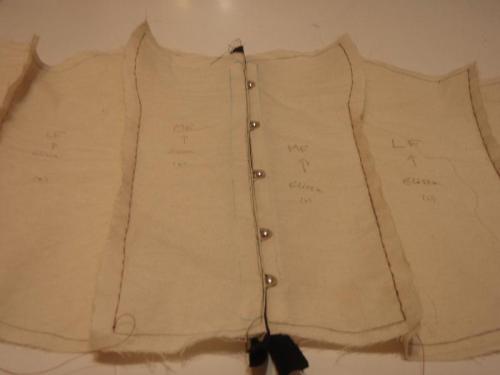
    The pattern pieces sewn together. But wait...

  • This is where I suddenly noticed that the two pieces are not the same shape. Minor confusion ensued, as I tried to figure out where I’d sewn something wrong (all the seams match ok!). It seems that friday night with friends and Hot Fuzz is not conducive to error-free sewing.

    It should have been like this.

  • Now there are two correct half-corsets. I know they’re correct because I checked three or four times.

Step 4 – Inserting the Busk

  • The busk is the hooks-and-eyes on a strip of boning doo-hickey that is used for the front closure. Having a front closure means you don’t have to unlace and relace the back completely to get in and out of the corset. To get a better idea of the shape it will give to the final corset, I decided to insert the busk in the mockup, instead of just sewing the front seam. This was a slightly tricky procedure, and I’m glad I did it now – some practice before I do the important one.
  • In the final corset the busk will go between the outer fabric and the lining. I cut some strips of fabric and sewed them to the two centre-front seams to simulate the lining. I pressed the seam open and then pressed it again folded back into position. I’m a big fan of pressing – it makes the seams look better, and for something like this it also opens the seam right up and keeps it flat, right where it should be. Pressing makes garments look like they were sew by someone with skillz.
  • Then I lined up one of the busk pieces and traced around it with a fabric pen. I laid the two front seams together, lined up, with the (hooked together) busk on top, and traced the second busk piece. I also marked where the hooks and the eyes would go.
  • On the eyes side, I unpicked bits of the side seam where the eyes would slip through between the two pieces of fabric (Aside: quick-unpickers are like socks for disappearing – I have 4 in my house and couldn’t find any. Until I was finished carefully unpicking with scissors, when I found one in the sewing table). I also did some top-stitching to reinforce the seam – otherwise the loose ends where I unpicked would pull the seam apart under pressure. I’ll do something a bit more careful and elegant for the final corset – this time round it’s just a proof of concept and a practice run.

    The "eyes" side of the busk

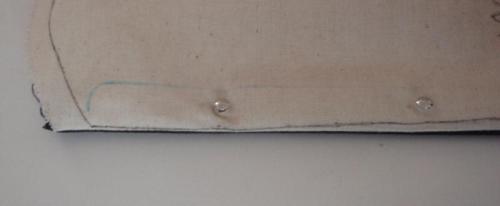
  • On the hook side, I had to make holes in the fabric to poke the buttons through. This is supposed to be done with an awl, pushing between the threads of the fabric, so that there are no broken threads to reduce the structural integrity of the fabric. I don’t have an awl, so I used crochet hooks – starting with the 3mm, then a 5mm, until the hole was big enough to get the button through.

    The "hooks" side of the busk

  • Here it is with the busk “done up”:

    Ta da!

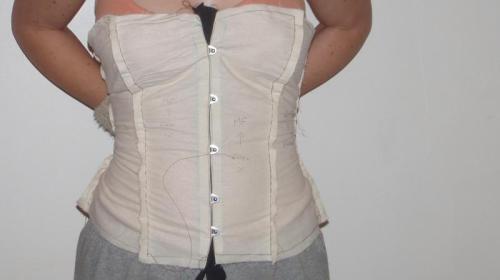
  • The last step was to try it on and see how it fit. Despite the gaffer tape in Step 1 being pulled tight enough to really squish me, it is big enough to meet at the back – there should be a gap for the lacing. I’ll be taking off a few centimetres at each side seam to fix that. Other than that it seems to fit pretty well – hooray!

    It fits! Hooray!


Step 1 – Fun with gaffer tape

  • Put on an old t-shirt (no bra) and get a friend to wrap you up in gaffer tape. Err on the side of tightness, because once it’s made, the gap at the lacing will make the real thing looser than the gaffer tape version. Choose lighter-coloured gaffer tape so that you can draw on it with a marker pen. Run out of gaffer tape when have you go over it again to make it tighter, and end up using black instead of silver (so much for that bright idea).
  • Mark the centre front and centre back with a marker pen or coloured tape. Mark the edges of the pattern pieces – I’m going to have 8 pieces in total, four at the front and four at the back. This is a good time to also mark out the shape you want the corset to have – before you cut it off. I forgot this bit. 😛
  • Cut up the centre front. Use good scissors which will cut at the tip of the blades! Because it’s so tight, if you have to use the back end of the blades, you’ll end up a bit stabbed. Even with good scissors you’ll probably be a bit stabbed. Don’t forget that you’re naked under the t-shirt – you might want to do the cutting in a different room than the one all your friends are in (I nearly forgot this bit :P)
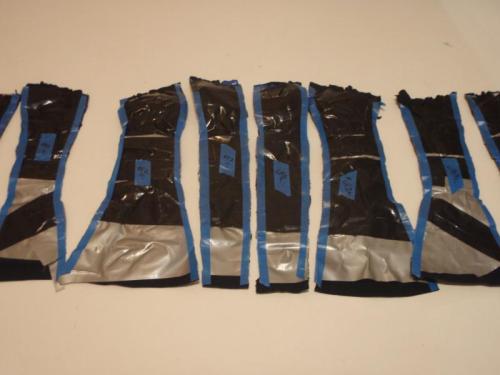
  • Cut along the marked lines to get the pattern pieces. Mark each piece as you go so that you don’t forget which one is which.

    The gaffer-tape cut into pattern pieces.

  • Trace the pattern pieces – you’ll have two of each, in my case centre front, outer front, outer back and centre back. Trace the matching pieces over each other – they won’t be the same shape, but should be fairly close. Once you’ve traced them, “split the difference” to get one shape for each pattern piece.

    The gaffer-tape pieces traced out in black, and the "split the difference" marked in blue.

Step 2 – Tweaking The Pattern

  • Put on Pride and Prejudice. The BBC version, obviously, because a) it’s the only one that really counts, and b) you’ll need something long. I got through three and a half episodes.

    My pattern is nearly finished and Lizzie heads off to Derbyshire...

  • Cut out the pieces you traced in step 1. Hold them up to yourself, mutter under your breath, despair. Remember another approach you saw on the Internet. Decide to give that a go, using the existing pieces as a starting point. Find the links in Evernote and feel momentarily smug.
  • Take some measurements – bust, underbust, waist, hip, and the distances between them all at the front and the side.
  • Get a large piece of paper – draw a vertical line for the centre front. Measure out perpendicular lines for bust, underbust, waist and hip.
  • Figure out where the waistline is on your existing pieces, and lay them out, lining up their waist markings with the waist line on the paper. Trace around them.
  • Measure to make sure that the pattern pieces add up to approximately your waist measurement minus something. This is the time for some more despair, until you figure out which wrong lines you’re measuring between. Coloured pencils may help. If things look about right, move on. Otherwise, repeat as necessary.
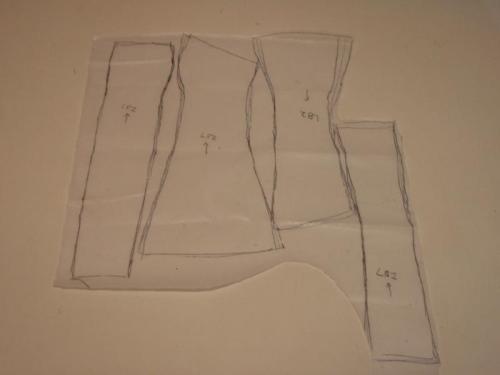
  • Now you need to “true” the seams – that is, make sure that the length of each seam line matches the corresponding seam on the other pattern piece. They should be pretty close, unless, like me, you forgot to mark out the top and bottom edges of your corset before and need to do it now. Here comes more measuring, more holding up pattern pieces against yourself, and – of course – more despair. If you’ve already ordered your busk (the front fastening thingy), you need to figure out an outline that fits it. Draw small sketches, look up google images. Sketch the lines you think you want, then measuring along the edge of the pattern piece from the waistline out, match up the top and bottom lines.

    The paper pattern, complete.

  • Once they all match, sit back and admire your work for a moment before organising for a friend to sanity check your pattern. Plan a trip to the public library to photocopy your handiwork so that you don’t have to start from scratch if disaster befalls your first copy. My pattern pieces will fit nicely on two A3 pages, and 60c is a small price to pay for not having to do this again from the start.

Up next: Making a mockup to check the pattern and practice the construction process.

Overtrained

I am severely hampered by my academic training when it comes to writing blog posts. I feel the need to go search the literature, find some sources, substantiate my comments with references, nearly every time I think of something to write about. I also feel the need to explore a topic in some depth – a short post just doesn’t seem enough to get into the complexities and substance of whatever it is (and there must be complexities and substance, because I can’t just describe, I must analyse). And then there’s proof-reading and re-organising and general fixing-up, because I do that by reflex now, even in a three sentence email (and then there’s pondering my misuse of the em-dash, an eternal conundrum).

But these are processes that take time and effort – and that vague thought about other people’s relationships with my relationship with caffeine is just not important enough to get to the top of my todo list. Sigh.

Ideas that are in the works: what is it with caffeinated people judging un-caffeinated people? How did we ever plan holidays without social media – and how has social media changed how we work? Ethics and independent scholarship – how do you work (and get published) without an institution and an ethics committee? (Short answer: second author w/ institution, I guess – but what does it mean for my work?) And how did my fabric stash get so huge? … Wait, I know the answer to that – I’m a procrastinator who can get free fabric from work – never mind!

That is all.

(PS- this was meant to be one short paragraph. Whoops!)

Library Privileges!

I went to uni today to get Alumni library membership. It seems as though they don’t get many people signing up, as the folks at the front desk seemed a bit bewildered. I don’t think they get many people paying by cheque either 😛

I came home with three anthropology of birth books, for my project at CMWA, and one about shibori, for my upcoming dying adventures. Yay! But next time I ride my bike to the library I need to remember to take a backpack instead of just a shoulder bag – it was a very uncomfortable ride home – with 5 books (one quarto sized), plus notebook, diary, wallet, etc, my bag was pretty heavy, and very hard to balance. But I now have plenty of reading matter to keep me occupied, and soon I will also have journal access – sweet, sweet journal access.

I’m more excited about this than most people would think healthy, but it’s very frustrating to be used to having all this information available, and then suddenly it’s not, and you’re stuck swearing at websites that ask for ridiculous one-off payments and don’t even put the abstract up for you. Not that I would pay anyway, but it’s still annoying. But no more! Now I can read journal articles again, hooray! And all those books… I feel like a kid in a sweet factory.